Showing posts with label studio. Show all posts

Tuesday, January 26, 2010

Dark Glare [Resplandor Oscuro]

My photography classes have ended (for now) but my quest for new knowledge continues. I have lots of ideas in my head and lots of doubts as to how to develop them but I'm working on a series I hope to one day share with you.

[Las clases de fotografía han terminado (por el momento) pero mi búsqueda de nuevos conocimientos continua. Tengo muchas ideas y muchas dudas sobre como desarrollarlas pero estoy trabajando en una serie que espero compartir con vosotros un día.]

At the moment my computer rests from processing 2GB images and I surf the web in search of new and neat photoshop tricks to keep my creative juices flowing.

[Por el momento mi ordenador descansa de procesar imágenes de 2GB y yo navego por la web en busca de nuevos y geniales trucos de photoshop para no perder la creatividad.]

Today I read about the Dark Glare Effect on the Photoshop Support Group bulletins. I've adjusted their system to my tastes, below my images you'll find the steps I followed and you can see more examples on the link above.

[Hoy leí sobre el efecto llamado resplandor oscuro en el foro Photoshop Support Group. He ajustado el sistema a mi gusto, abajo de las imágenes encontraras los pasos que yo sigue y puedes ver mas ejemplos en el link de arriba. Y perdonad pero no he incluido la traducción de los pasos pero si te interesa me lo dices y te lo envío.]

'CORPORATE ANGST'

ANGST'

1. Open image in Photoshop.
2. Immediately duplicate image as a new layer.
3. Go to IMAGE, then ADJUSTMENTS, select HUE/SATURATION, desaturate duplicate layer. Change blend mode for this layer to MULTIPLY.
4. Duplicate original image again in a new layer.
5. Go to IMAGE, then ADJUSTMENTS, select HUE/SATURATION, desaturate duplicate layer. Change blend mode for this layer to OVERLAY.
6. Duplicate this last layer.
7. Go to IMAGE, then ADJUSTMENTS, select HUE/SATURATION, desaturate duplicate layer.
6. Adjust opacity of layers as necessary and to your liking.
7. Adjust contrast via CURVES or LEVELS as necessary and to your liking.

At this point the tutorial went into blurring and coloring etc. I didn't find these steps necessary as I like my images completely focused but everyone has their own style so you may enjoy. Check out the link above. I skipped ahead to the following:

8. Go to LAYER on the toolbar. Select NEW FILL LAYER, select SOLID COLOR. Here I went with a sepia tone type color.
9. Change blend mode for this layer to OVERLAY and reduce opacity to between 5 - 10%, depending on your taste.

At this point I masked and unmasked some areas to my liking but it's not necessary. I hope I didn't miss any steps and if you ever end up using this method, let me know how it works out. = )

Monday, October 19, 2009

... & Gentlemen [... & Caballeros]

A big, BIG thank you to Fernando and Ivan for letting themselves be dolled up by the wonderful make-up artist Belinda Alonso.

[Muchas, MUCHAS gracias a Fernando y Ivan por dejarse maquillar por la estupenda maquillista Belinda Alonso.]


Models [Modelos]: Ivan Sanchez España/Fernando Tabernero Sanchez

Make-Up [Maquillaje]: Belinda Alonso

Photography/Direction [Fotografía/Dirección]: Ivett Chicas

© 2009 Ivett Chicas

Friday, October 2, 2009

Professional Models Are Great! [Modelos Profesionales Son Estupendos!]

I now realize why photographers work with certain models over and over again. Smart models are the bestest. They're patient, they know where the light hits them best, they know how to move their body, and they follow direction without hesitation. Like I said, they're great.

I've been lucky to work with
Mani twice now. She already knows what I want before I've even finished my sentence. Here is the latest from her:

[Ahora me doy cuenta porqué los fotógrafos trabajan con ciertos modelos una y otra vez. Los modelos inteligentes son estupendos. Son pacientes, saben donde la luz incide en ellos mejor, saben cómo mover su cuerpo, y saben cómo seguir la dirección sin vacilar. Como he dicho, son estupendos.

He tenido la suerte de trabajar con Mani dos veces. Ella ya sabe lo que quiero incluso antes de que termine de decir mi pensamiento. Este es el último trabajo con ella:]

I'm thinking of something more creative I can do with her ... stay tuned.

[Estoy pensando en algo más creativo que puedo hacer con ella ... estad atentos. ]

Today I had the privilege of working with a new model. Unfortunately I didn't get her info as I was busy exchanging info with a fellow classmate, but again, stay tuned. Today we were shooting publicity shots for sunglasses. You can see the light set-up in her shades, but just in case, scroll down for a shot of the studio.

[Hoy he tenido el privilegio de trabajar con una modelo nueva. Lamentablemente no he cogido su información porque estaba intercambiando datos con un compañero de clase, pero os digo otra vez, estad atentos. Hoy era clase de publicidad, el producto -- gafas de sol. Podáis ver el conjunto de luz en sus gafas, pero por si acaso, mas abajo podáis ver el estudio.]


© 2009 Ivett Chicas

Wednesday, September 23, 2009

Nerves [Nervios]

Working with a model makes me a little nervous. Working with an experienced model that knows her way around a studio is just plain intimidating.

Below are my favorite shots from a recent class studio session. If you're interested in lighting and camera specs click on the images.

[Trabajar con una modelo me pone nerviosa. Trabajar con una modela con experiencia, con mucho conocimiento del plato, es una experiencia aterradora.

Abajo están mis tomas favoritas de una sesión de clase en plato. Si te interesa leer sobre la iluminación y criterio de cámara haz clic en las imágenes.]

Model [Modelo]: Mani Roth
Dress/Make-Up [Vestido/Maquillaje]: Mani Roth
Direction [Direccíon]: Ivett Chicas

Tuesday, July 14, 2009

Back to Black & White

I've always been a big fan of Black & White photography. Old photographs printed when paper still had real silver has some of the best tones which are just not available with the papers we have today --- especially not with digital. (To see some of the best range in grays check out Ansel Adams.)

But alas, you have to adapt to the times. This means shooting in color and converting to grayscale later. There are various ways to convert to grayscale ... how you do it will depend on the picture and your liking. I'd recommend selecting a picture, doing all the below listed steps and seeing the differences on your own.

NOTE: You can convert to grayscale straight from Camera Raw, below are the methods in Photoshop. ALSO, before your play with the below methods, go to HISTORY OPTIONS and select ALLOW NON-LINEAR HISTORY. This will record all the below actions so you can easily compare differences. Each time you convert go back to the original color image in the HISTORY panel and try the next method.

1. Go to IMAGE in the toolbar. Go to ADJUSTMENTS. Select DESATURATE.

2. Go to IMAGE in the toolbar. Go to MODE. Select GRAYSCALE.

3. Go to IMAGE in the toolbar. Go to ADJUSTMENTS. Select GRADIENT MAP.
----Under this selection a dialog box will open, click on the little down arrow next to the gray box. Select the 3rd option from the left, which is a box that goes from black to white. Click OK.

4. Go to IMAGE in the toolbar. Go to MODE. Select Lab Color.
----Under this selection you'll now need to go to CHANNELS. Here you will see 4 boxes, click on the box that says 'lightness' ---- be sure to click the image and not the little eye. = ) Once you've clicked on 'lightness' and only that box is highlighted, go to IMAGE in the toolbar. Go to MODE. Select GRAYSCALE.


5. Go to IMAGE in the toolbar. Go to ADJUSTMENTS. Select Black & White.
----This will convert to grayscale and will open a dialog box so you can adjust colors. The color adjustments work similar to filters used with a camera. For example if you take away blue your sky will get darker. If you add blue your sky will get lighter. This option is good except there is no way to know when you are loosing information in your image, you'll need to rely on your visual preference.


6. Go to IMAGE in the toolbar. Go to ADJUSTMENTS. Select Channel Mixer.
---- This will open a dialog box. At the very bottom select where it says MONOCHROME. this will convert to grayscale and will allow you to adjust the colors similar to the above option. However, be sure that Red, Green and Blue add up to 100% --- this is the advantage over the above method. Also, if you go to the top of the dialog box and hit the down button you can select presets such as Infared Filter etc.


I'm a big fan of method #6. I used this for the below images and kept most of the color at red. A red filter is great for portrait shots as it evens out the skin and gets rid of blemishes.

Thursday, June 4, 2009

Studio: White Backdrop

I've been in the studio twice now. The first time I went in blind, took me about 10 minutes to figure out I was measuring the light incorrectly. But I got to know my classmate Karla a bit and we agreed to meet again the following Tuesday ... which was this week.

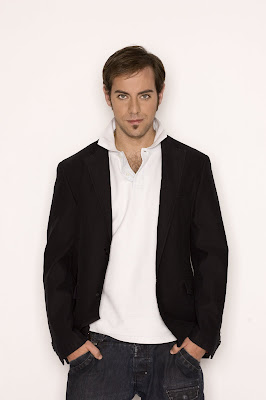
Initially, we went in thinking we would do still life again but we had a third companion this time --- his name is Antonio --- and between the three of us, portrait (retrato) shots seemed like more fun.

A few things of note:

When you want to use a white back drop (fondo blanco) be sure that the light measurement (medicion de luz) is the same both where the subject will be located and also against the backdrop. This will make the white appear overexposed (sobreexpuesta), which doesn't matter because white is white is white. Better to have an overexposed white ... which looks white, then an underexposed (subexpuesta) white which will look gray.

For our session we placed two lights facing the backdrop, one on either side facing the center. To light our subject we used a third light, which we covered with a "window" --- this is like a screen that is square shaped and goes over the bulb. Perhaps I should take pictures of the equipment so you know what I´m talking about. We then moved this third light back and forth and from side to side depending on what we had the subject do and we used various reflectors to fill in the shadows. (Side note: Miriam, in case you read this, thanks for the reflector you gave me ... I´ve been using it tons!)

Another very important note which I will go into more in another blog ... if you are going to retouch your photos in photoshop always, ALWAYS, ALWAYS, shoot in RAW mode. I have taken a vow to never shoot in JPEG again. Why, oh why, did I not take a digital photo class before???

Here are some pictures from this weeks session:


Stay tuned for next weeks session. ; P